If you’ve ever walked barefoot on a cold morning and wished your home could just hold warmth the way the earth does, you’re already thinking like a geothermal engineer.
Beneath your feet, roughly six feet below the frost line, the ground maintains a surprisingly consistent temperature year-round — typically between 45°F and 75°F depending on your region. Geothermal heating and cooling systems harness that thermal stability to regulate indoor temperatures with remarkable efficiency. No combustion. No dramatic swings in energy bills. Just quiet, consistent comfort drawn from the earth itself.
This guide breaks down exactly how these systems work, what makes them different from conventional HVAC, and why more homeowners, commercial builders, and energy-conscious developers are making the switch.
What Is Geothermal Heating and Cooling?
Geothermal heating and cooling — also called a ground-source heat pump (GSHP) system — is a technology that transfers heat between your home and the ground rather than generating heat through combustion or resistance. Think of it less like a furnace and more like a refrigerator working in reverse.
Where a traditional HVAC system creates conditioned air by burning fuel or running electric resistance coils, a geothermal system moves existing thermal energy. That fundamental difference is what makes it two to five times more energy-efficient than conventional systems, according to the U.S. Department of Energy.
“Ground-source heat pumps are among the most efficient and comfortable heating and cooling technologies available today.” — U.S. Department of Energy, Office of Energy Efficiency & Renewable Energy
The Core Principle: Heat Transfer, Not Heat Generation
Before diving into components, it helps to understand one foundational concept: heat naturally flows from warmer areas to cooler ones. Geothermal systems simply manage and redirect that flow.
In winter, the ground is warmer than the cold outdoor air. The system pulls heat from the Earth and moves it inside.
In summer, the ground is cooler than the hot outdoor air. The system pulls heat from inside your home and deposits it into the earth.
It’s elegant, physics-based, and doesn’t rely on fossil fuels to work.
How the System Actually Works: Step by Step
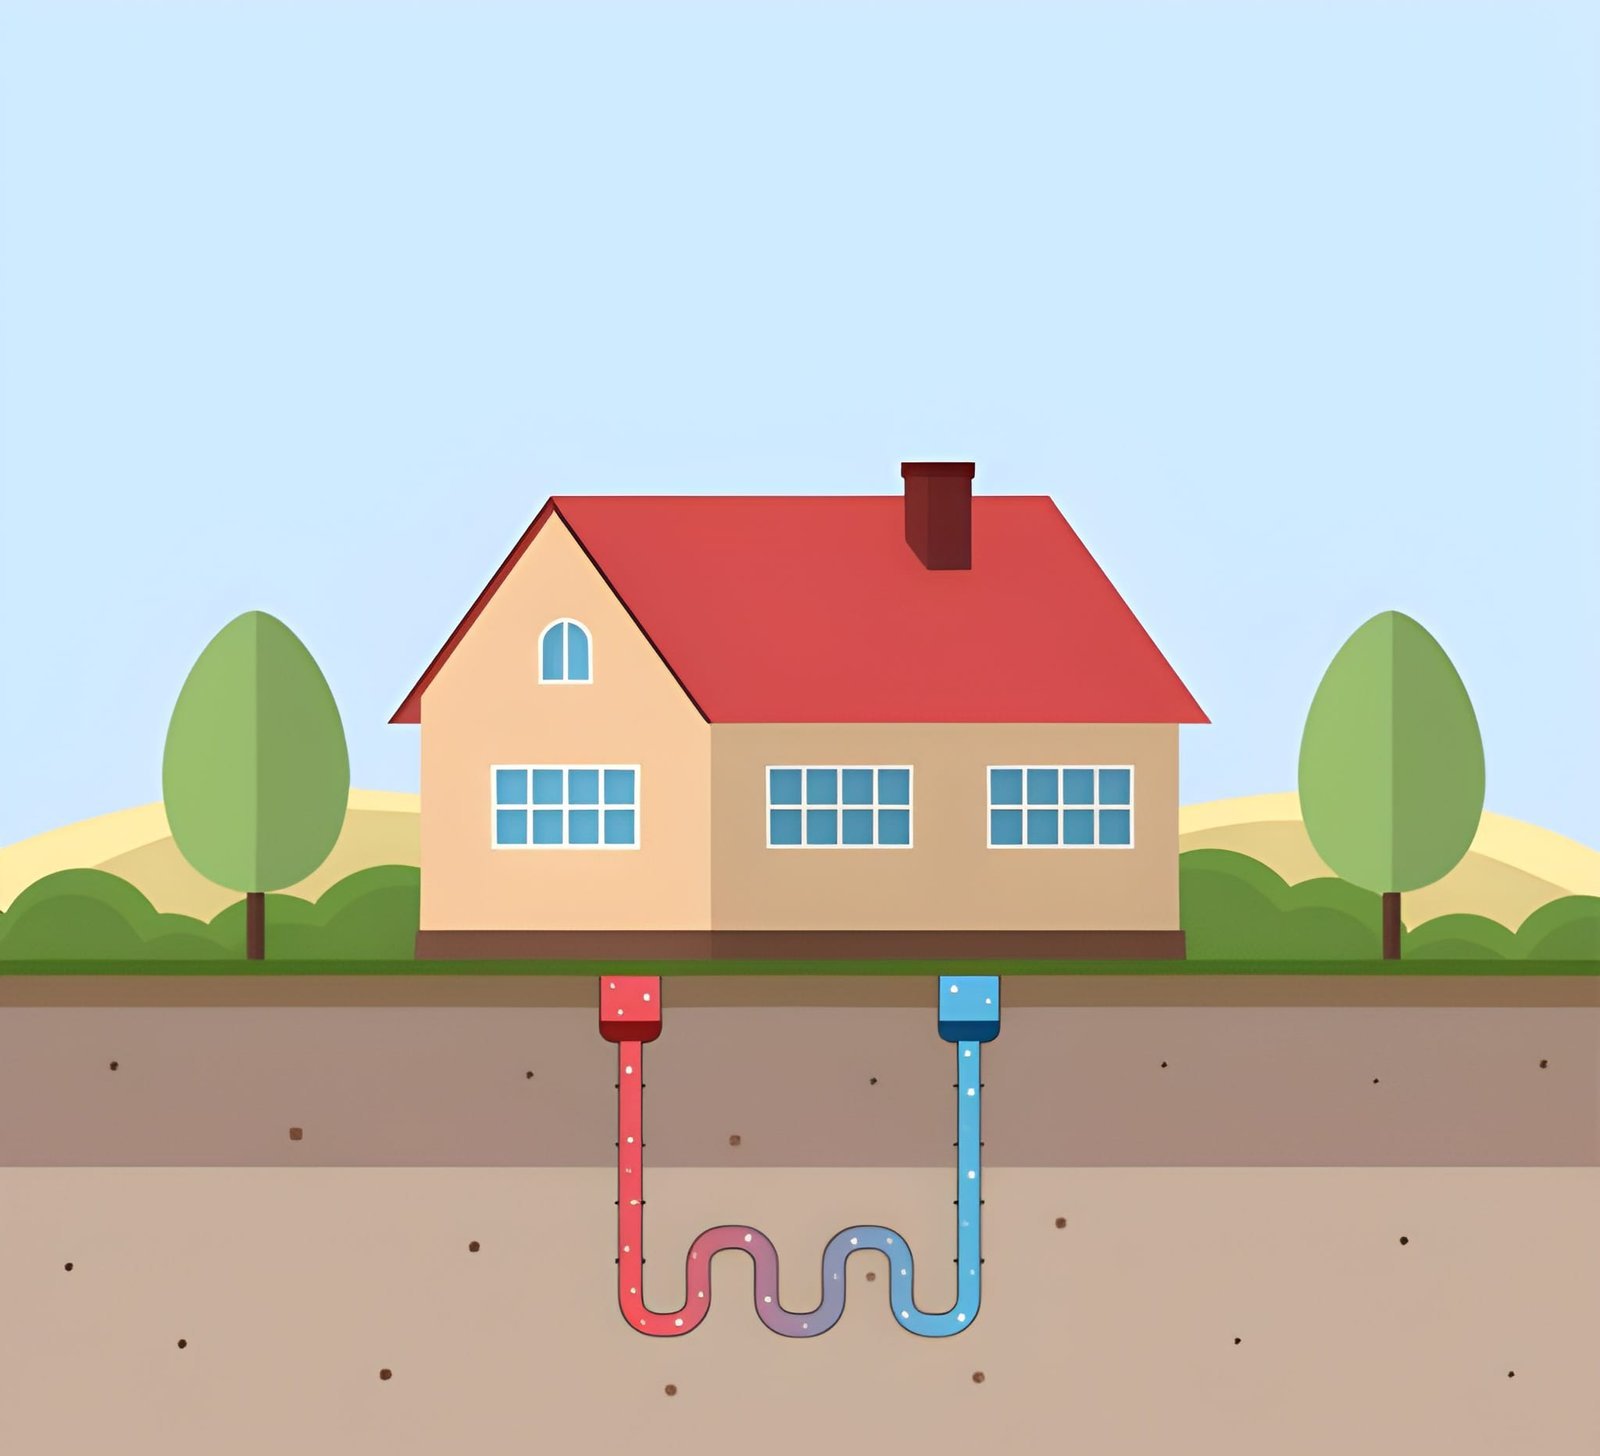
1. The Ground Loop — Where It All Begins
The heart of any geothermal system is the ground loop — a series of pipes buried in the earth near your property. These pipes circulate a water-based solution (sometimes with antifreeze) that absorbs or releases heat depending on the season.
There are four primary loop configurations:
Horizontal Loops Ideal for properties with ample land. Pipes are buried in trenches four to six feet deep, typically in a parallel or slinky pattern. This is usually the most cost-effective installation option for residential properties with sufficient yard space.
Vertical Loops When land is limited — think urban lots or commercial properties — vertical boreholes are drilled 100 to 400 feet deep. This approach requires specialized drilling equipment but has a much smaller surface footprint.
Pond/Lake Loops If your property sits near a body of water that’s at least eight feet deep year-round, coiled pipes can be submerged at the bottom. Water is an excellent thermal conductor, making this one of the most efficient loop configurations available.
Open-Loop Systems These use actual groundwater from a well, circulate it through the heat pump, and return it to the aquifer or discharge it to the surface. They’re highly efficient but require access to a suitable water source and local regulatory approval.
2. The Heat Pump Unit — The Engine of the System
Once the fluid in the ground loop has absorbed or shed heat, it travels to the heat pump unit inside your home. This is where the thermal energy gets amplified and converted into usable heating or cooling.
The heat pump contains three key components:
- A refrigerant circuit — similar to what you’d find in an air conditioner or refrigerator
- A compressor — which increases the pressure and temperature of the refrigerant
- Heat exchangers — which transfer thermal energy between the refrigerant, the ground loop fluid, and your home’s air distribution system
In heating mode: The ground loop fluid (warmer than the indoor air in winter) passes through a heat exchanger called the evaporator. The refrigerant absorbs this heat and evaporates into a gas. The compressor then pressurizes the gas, raising its temperature significantly. That heat is transferred into your home’s air supply through a second heat exchanger called the condenser.
In cooling mode: The process reverses. Heat is extracted from your indoor air, transferred to the refrigerant, and ultimately deposited back into the ground loop — and into the earth.
3. The Distribution System — Delivering Comfort
Geothermal heat pumps connect to your home’s existing distribution infrastructure:
- Forced-air ductwork — the most common configuration, compatible with most existing homes
- Radiant floor heating — an increasingly popular pairing that delivers luxuriously even warmth
- Hydronic systems — which heat water for radiators or baseboard units
One underappreciated advantage here: geothermal systems deliver air at a consistent, moderate temperature — typically between 90°F and 100°F — rather than the blasts of 120°F+ air that gas furnaces produce. The result is a more even temperature distribution throughout your home and significantly less dust circulation.
4. Desuperheater — Free Hot Water as a Bonus
Many modern geothermal systems include a desuperheater, a small secondary heat exchanger that captures excess heat from the compressor and uses it to preheat your domestic hot water supply.
During peak heating or cooling seasons, this can offset 25% to 50% of your water heating costs — essentially giving you hot water as a byproduct of climate control. Some high-efficiency systems can even provide 100% of your hot water needs during the summer months.
Geothermal vs. Traditional HVAC: A Practical Comparison
| Feature | Geothermal System | Traditional HVAC |
|---|---|---|
| Energy Source | Earth’s stored thermal energy | Natural gas, propane, or electricity |
| Efficiency Rating | 300%–500% COP | 80%–98% AFUE (gas); ~100% (electric) |
| Operating Cost | Low | Moderate to high |
| Lifespan (Indoor Unit) | 20–25 years | 15–20 years |
| Lifespan (Ground Loop) | 50+ years | N/A |
| Carbon Emissions | Very low | Moderate to high |
| Installation Cost | Higher upfront | Lower upfront |
The efficiency metric worth understanding here is COP (Coefficient of Performance). A geothermal system with a COP of 4.0 means that for every unit of electricity consumed, it delivers four units of heating energy. No combustion-based system can match that physics.
Real-World Performance: What Homeowners Actually Experience
Consider a 2,500-square-foot home in the Midwest. A conventional gas furnace and central air setup might cost $2,200–$2,800 annually in energy costs. A properly sized geothermal system in the same home typically runs $700–$1,100 per year — a reduction of 50% to 70%.
The Oak Ridge National Laboratory, which has conducted extensive field studies on residential geothermal systems, found that ground-source heat pumps consistently outperform air-source heat pumps in cold climates and deliver the most dramatic savings in regions with extreme temperature swings — precisely the conditions where conventional systems work hardest and cost most.
In commercial applications, the numbers scale impressively. Ball State University in Muncie, Indiana, converted its entire campus from coal-based heating to a geothermal district energy system serving 47 buildings. The project eliminated 85,000 tons of carbon emissions annually and reduced energy costs by approximately $2 million per year.
The Installation Process: What to Expect
Installing a geothermal system is a multi-phase project that typically takes three to five days for residential installations, longer for commercial builds.
Phase 1 — Site Assessment A qualified geothermal contractor evaluates your property’s geology, available land, proximity to water sources, and existing HVAC infrastructure. This determines which loop configuration is appropriate.
Phase 2 — Ground Loop Installation This is the most invasive and expensive phase. Horizontal systems require significant trenching. Vertical systems require drilling. Expect temporary disruption to landscaping.
Phase 3 — Heat Pump Installation The indoor unit is installed, connected to the ground loop, and integrated with your distribution system. If you have a forced-air system, this transition is relatively straightforward.
Phase 4 — System Commissioning The system is charged, tested, and calibrated. A reputable installer will verify loop pressures, flow rates, and heat pump performance before signing off.
Tax Incentives and Financial Considerations
This is where the financial picture becomes considerably more attractive.
In the United States, the Inflation Reduction Act of 2022 extended and expanded the federal tax credit for geothermal heat pump installations to 30% of total system costs through 2032. For a $20,000 installation, that’s a $6,000 direct reduction in your federal tax liability — not a deduction, but an actual credit.
Many states offer additional rebates and incentives. Utility companies in regions with high peak demand frequently offer their own rebate programs specifically for geothermal installations because they reduce grid stress during extreme weather events.
With incentives applied, payback periods typically fall in the 5 to 10 year range, after which the system delivers decades of reduced operating costs.
The Environmental Case
For homeowners and businesses with sustainability goals, geothermal heating and cooling offers one of the cleanest pathways available in the built environment. The EPA has recognized ground-source heat pumps as the most environmentally friendly heating and cooling technology on the market.
When powered by renewable electricity — solar, wind, or grid-sourced renewables — a geothermal system approaches true carbon-neutral operation. For buildings targeting net-zero energy certifications, geothermal is frequently a cornerstone technology.
Summary
Geothermal heating and cooling isn’t futuristic technology. It’s mature, proven engineering that’s been in commercial use since the 1940s and in widespread residential deployment since the 1970s. What’s changed is cost, efficiency, policy support, and the urgency with which homeowners and developers are seeking alternatives to fossil fuel dependence.
The ground beneath your property has been storing thermal energy for as long as the earth has existed. A geothermal system simply gives you a reliable, intelligent way to use it.
If you’re building new, renovating, or simply calculating the long-term cost of an HVAC system, a conversation with a certified geothermal contractor is worth scheduling. The numbers, the comfort, and the environmental case have never been more compelling.